In my previous blog, I’ve emphasized the importance of not using administrator account for everyday tasks, such as reading your email, browsing the web, running your programs etc. In this blog, we’ll look at how to remove the administrator access from the first account that you have created during the Windows installation process.
By default, Windows installation proceeds with the administrator account, amply named “Administrator”. This is the initial account that has full access to the system and installs all the necessary drivers, programs, etc. When the installation is about to be completed, Windows will force you to create a user account with a password. This account name cannot be the name of existing accounts, but other than that, you’re free to choose a name. This first account created is assigned “Administrator” rights by the installation routine and the initial “Administrator” account is disabled. This installation routine first appeared in Windows Vista and continued with Windows 7, Windows 8.x, and presumable will be the same in Windows 9.
Back to the subject on hand and let’s remove administrator access for the first user account created in Windows…
The process is simple enough and the basic steps are:
- Create a new administrator account
- Login with the new administrator account
- Change account type for the “%Default first user%”
There’s no way to know the name of the first account that you’ve assigned on your system. For the purpose of this blog, the name of the first account is indicated by the variable of:
“%Default first user%”
Please substitute this name with your first account you’ve created during Windows installation.
Step 1:
Open up the “Control Panel” and you should see this, if you have “Category” listing selected:
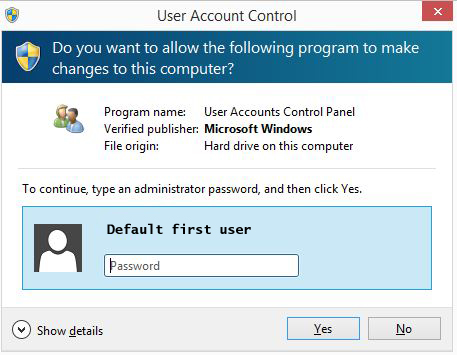
Select “Add or remove user accounts”, note the little shield front of it, under the “User Account and Family Safety” category. The little shield indicates, that using this step will require local administrator access, if your system had not been modified since installation. In which case, the User Access Control (UAC) warning like this will pop up first:
The UAC window on your system will have your first account’s name prepopulated, instead of the shown “%Default first user%” variable. You will not see this warning, if the UAC is disabled.
Enter your password for the account, click “OK”, to see the current accounts on your system:
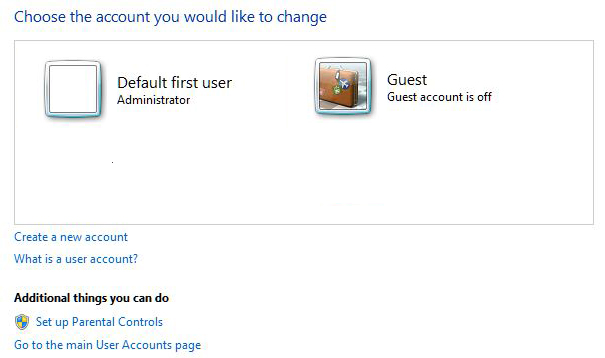
In this window, click on “Create a new account”:
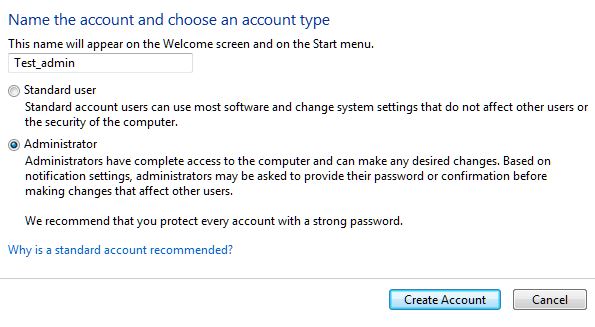
Choose a name for the new account that is meaningful for you. it can be anything you’d want. For the purpose of this blog, the account is named “Test admin”; substitute this name with your choice. Select “Administrator” for the account type and click on “Create account”, that brings up the current user accounts listing window, with the new account:
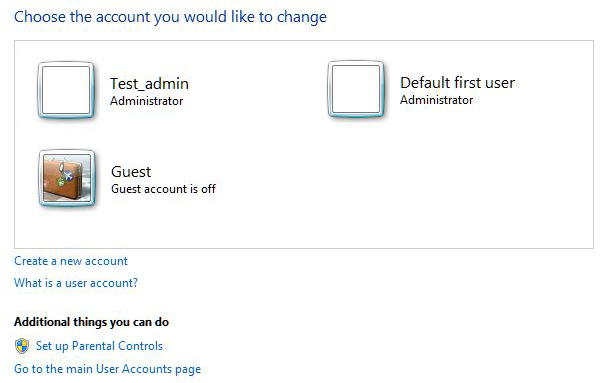 There’s no requirements for creating a password for the new account and it is created by the system with no password. In the computer world, no password is a password. Depending on the password policy on the system, you could:
- Logon with the new account without password
- The first logon will force you to change the password
You have couple of choices for setting a password for the new account:
- Set the password using the Control panel
- Change password at time of first logon with the new account
- Login with no password and change it
In either case, you should set a password that is 6-8 character long, non-dictionary word, include a number, and/or special character.
Log off your account and proceed to the next step…
Step two:
This is a simple step, just select the newly created account, type in the password, and hit “Enter” to login with the new account. Initially, Windows will set up the new account and starts up the new profile.
Step three:
In this step, you’ll remove administrator access from the “%Default first user%”, again, please substitute the this name with your account’s name. As explained earlier, open Control Panel, under the “User Account and Family Safety” category, click on “Add or remove user accounts”:

Click on the “%Default first user%”, substitute this variable with the name of your account to show the available options:
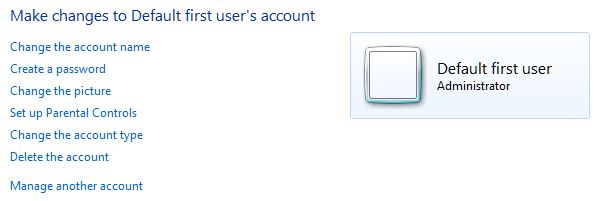
The options include “Create a password” that you could use in “Step one” for setting the password for the new account created.
Click on change the account type:

Select “Standard user” and click on “Change Account Type”:
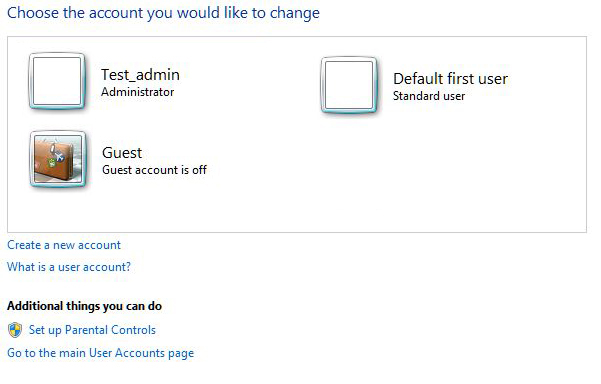
You’re pretty much done, logoff from the new administrator account. Test the modified account without local administrator access to the system, logon with this account. Your personalization of desktop, shortcuts, etc., did not change. Most if not all programs will run just fine with standard user access to the system. For programs that require administrator level access, the system will popup a UAC warning. You really should consider replacing this program, but that might not be an option. In which case, just enter the password for the administrator account and the program will run.
If removing the administrator access from the “%Default first user%” causing issues with your system and/or limits your productivity, reverse the process in “Step three”.


